Published
on
September 27, 2017
| 695 views
| 0 followers
members are following updates on this item.
Coming out of ICE, we've got a lot of questions about features and functionality in Support. Everyone's looking forward to the new features from the last release, as well as implementations they saw in each other's digital workplaces in Nashville. We've picked three of those questions to expand on here.
 How can I see who's viewed a blog post?
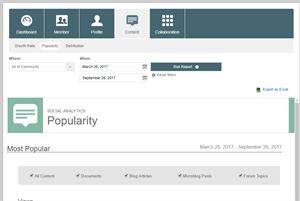
The thrust of this question wasn't merely how to get analytics for an article, that's easy. They wanted to see who had viewed their article, in order to reach out to them. There are a few ways to do that. It's possible to pull a report in the Social Analytics area, using the Popularity report from the Content tab. You can also query that information from the new datafeeds function, using a separate application like Microsoft Power BI.
The easiest way by far though, is to navigate to the Activity area on any piece of content. With the updates to the activity feed a few months ago, you can see which people have viewed the item, and anonymous users will appear as "Guest". The Activity feed will also provide a link to their profile, making it easy to get in touch with anyone who's viewed, downloaded, or modified an item.
Dropdowns give you the chance to add items to your primary or secondary navigation without taking up additional room on the page. You can add items to them by nesting them under Pages or Spaces in the Site Manager. It's common to want to customize them, letting you keep Channels or Pages close to the top of your navigation without showing them. By default, they'll show everything that's nested under the item that someone has access to, but there's always a way to make an exception.
You can hide items from dropdowns by navigating to the Site Manager, and selecting the Action Button next to the item you want to hide. Under the Navigation option, select Hide. That will hide it from the dropdowns, as as well as any other navigation bars and widgets. However, it'll still be accessible through links or through search. You get cleaner dropdowns, but the adjustment won't affect anyone's ability to access your content.
Inviting people to your digital workplace can be a great way to introduce them to it, and there are a lot of options to welcome them. The Invitations menu in your Control Panel gives you the option to send a personal message along with the information, as well as set up a welcome message that's sent after they've accepted the invitation and joined your Igloo. You can even customize the reply-to option, letting people reply to you directly.
If you have questions about the Igloo platform, workflows, or best practices, you can leave a comment here, or ask a question in the Community area.
Page Options